Go to the previous, next, chapter, table of contents.
2 Understanding the Genesis Preferences
2.3 Options
This section allows you to configure various options for Genesis. This options
are applicable to whether you are dialing a Internet Service Provider and/or
whether you have a local area network (or other network).
2.31 Display
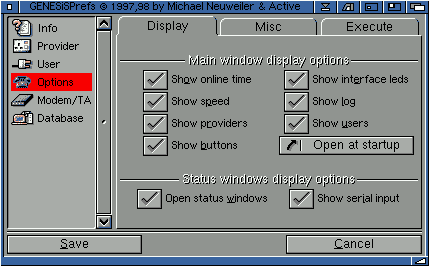
This section allows you to configure the various parts of the main Genesis
window itself:

- Show online time will show the amount of time that you have
been connected to the network. Unless you have free local calls or are simply
made of money, we suggest you leave this option on.
- Show speed: will show the connection speed when you connect
to your provider. This will normally be the baud rate unless you
specifically change this setting withing your modem init string.
ie. on many modems if you insert "W2" into the init string, this will show
the actually connect speed, rather than baud rate. Say your modem
init string was "AT&F&D2", you could send this "AT&F&D2W2" instead.
- Show providers enables you to see the provider list and drop down
button on the main screen.
- Show buttons: will show or hide the "connect" and "diconnect"
buttons, mainly to save space more than anything else.
- Show interface leds will show or hide the connection led's
which show different colours indicating the progress of connection. You will
seen grey if offline, yellow when dialing, orange when negotiating the
connection and green when online.
- Show log: shows the status information whilst connected. You
may never see much more than "ppp has been put online/offline" in this window
during an average Internet connection.
- Show users: will display the user list and drop down button. You
can select a user from the list when this is present.
- Startup options - choose how to show the main Genesis status
window on startup. You can show the window full (open), iconified (enables you to
inconfiy the main Genesis window when you start Genesis, but the provider will go
online automatically if selected (some people may prefer this option) or even closed
when you start Genesis.
- Open status windows allows you to see the status window whilst
dialig and connecting to your provider.
- Show serial input shows the connect speed and other serial
related information within the Genesis dial window.
2.32 Misc
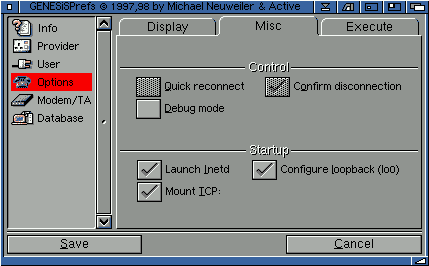
Section allows you to refine some of the deeper or more advanced parts of Genesis and/or the
Genesis interface.

- Quick reconnect: - when connected to your provider you may
need to warm reboot your machine. Perhaps your web browser crashed online or
another program - it happens!
As you are only warm rebooting, you shouldn't need to reconnect to your
provider. "Quick reconnect" allows you to reboot, and then press "connect"
and connect to your ISP within seconds.
Quick reconnect only works if you have warm rebooted and your modem is still
in a connected state (ie. you haven't turned it off and on again etc).
- Confirm Disconnection - if you accidentally disconnect for
some reason, a requestor will appear asking if you really do want to disconnect.
- Debug mode - put Genesis into debug mode. This uses the debug
information provided by the appp.device, so is only relevant to those users
making a connection to their Internet Service Provider.
You will also see information appear in the Genesis status window. This will
look something like:
Fri May 01 15:43:57 1998 [debug]: sana2_getaddresses: using destination IP address 158.152.5.212 from Sana2 device configuration.
Fri May 01 15:43:57 1998 [debug]: Using the destination address as default gateway address.
Fri May 01 15:43:57 1998 [info ]: AmiTCP NetDB: file AmiTCP:db/resolv.conf changed.
Fri May 01 15:43:57 1998 [note ]: ppp is now online
Fri May 01 15:50:32 1998 [note ]: ppp has been put offline.
The debug information is stored in a text file in t:.
- Launch Inetd - starts inetd on Genesis startup. Inetd is responsible for launching
daemons such as ftpd. httpd, identd etc.
- Configure loopback (lo0) - configures the local loopback interface on startup. This
allows you to use your system locally. For instance, if you are running an ftp daemon, you might
want to ftp (ftp://127.0.0.1) to your machine to test this daemon. Also applies to a local http
daemon an so on.
- Mount TCP: - the TCP: handler allows you to access TCP/IP network streams as
normal Amiga file handles. AmiTCP's TELNET uses this, for example, and some other applications. Usage:
tcp:host/port
Means make a TCP connect to "host" on "port"
tcp:port
Means make a listening TCP socket which acceps connections.
2.33 Execute
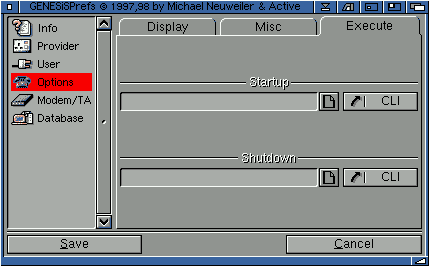
This part of the interface allows you to execute a DOS script, arexx command
or an actual program when you are connecting and disconneting.

For instance, you could send an arexx script to start an external (more
elaborate) online timer when you connect and disconnect.
Go to the previous, next, chapter, table of contents.


